 Whiteboard Animation
Education · Science lesson · 1:16
Tsunami animation
Watch a tsunami form step by step: the sea floor jumps up along a fault, the water above it rises, and a wave races towards a beach with houses. A hand-drawn whiteboard animation made from one illustration.
- Length
- 1:16 · 2 chapters
- Aspect ratio
- 4:3
- Colour starts at
- 0:58
- Style
- Lines + colour
- Formats
- 16:9 · 1:1 · 9:16
By Deniffer AlanPublished Tested by Deniffer Alan
Opens Studio with this picture, ready to draw.
Your own picture? How to prepare one
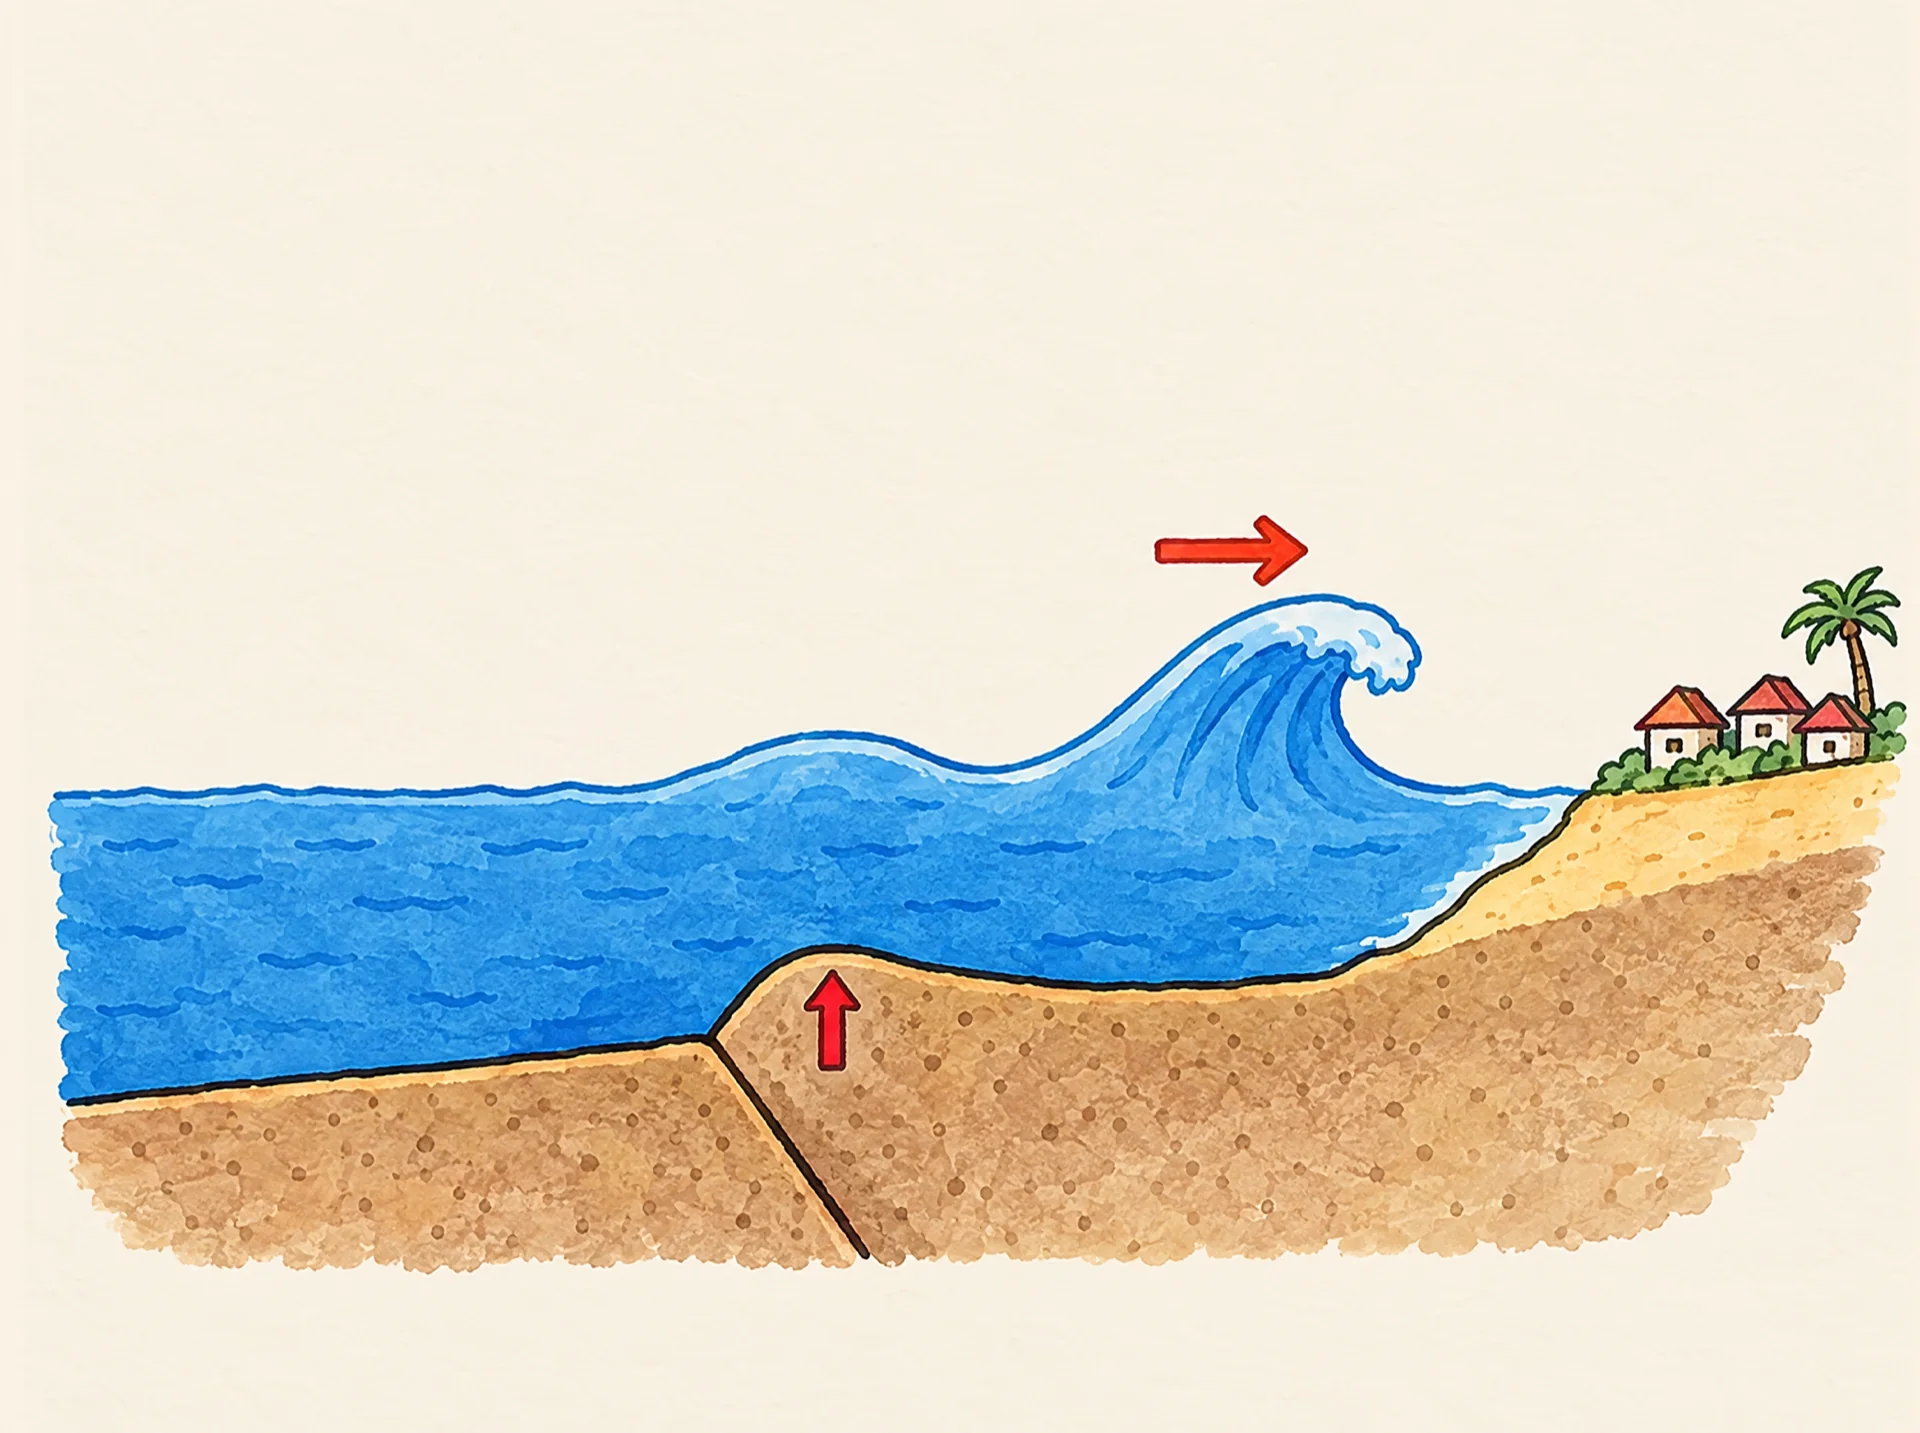
The picture it starts from
This finished illustration is all the drawing started from. Upload a picture like it and Studio draws it stroke by stroke; we don't generate pictures from text.
1920 × 1433 px · WEBP
The prompt behind the picture
Hand-drawn cross-section diagram of how a tsunami forms, seen from the side: along the bottom the sea floor is split by one slanted fault line, the right block of rock pushed up a step higher than the left block. There is exactly one short red arrow, drawn on the right block next to the fault, pointing straight up; there is no arrow on the left block. Deep blue sea water fills the space above the sea floor. Directly above the fault the sea surface has a low wide bulge. To the right of the bulge one tall wave travels towards the right, with one red arrow above it pointing right. At the far right a sandy beach slopes up out of the water with three small houses and one palm tree on it. Nothing else in the picture. Coloured pencil and watercolour marker, clean black ink outlines, warm off-white paper, no text.The picture came from an image model; any finished illustration works the same way, including one you drew. Use the prompt as a starting point for your own topic.
How this clip was made
The picture above was made with an image model from the prompt above; WhiteboardAnimation.ai then drew it, stroke by stroke, as the clip at the top of this page.
- Drawn
- Credits used
- 1
Notes from making it
The first picture put an up arrow on both sides of the fault, so it was made again with one arrow on the rising block only. The narration was checked against NOAA’s tsunami pages.
Tsunami, step by step
A script to read over it, timed to the drawing: the lines go down first and the colour arrives on the last beat.
- 0:00Line artA tsunami is a series of huge waves. It starts with a sudden push on the ocean, most often from an earthquake under the sea.
- 0:12Deep under the water, the sea floor can crack along a fault and suddenly move up or down.
- 0:23When the sea floor rises, the water above it is lifted too, making a low bump on the surface.
- 0:35The water moves up and down to settle again, and waves spread out in every direction.
- 0:47ColourOut in deep water the waves are not very tall, but they can travel as fast as a jet plane.
- 0:59Near the coast the water gets shallow. The waves slow down and grow higher and higher, and they can flood the land.
Where this tsunami animation fits
Use it in an earth science lesson on earthquakes and oceans, to start a topic on natural hazards, or as a short clip in a geography video. The same process turns your own diagram into a clip.
- Education
- Explainer videos
- Science
- Nature
Questions